Instructions for Floating Carbon Foils
Note: Remember, carbon foils are extremely delicate. Handle carefully in every step, the foils tear easily.
I. Baking (optional step, only needed if there are problems with the foils)
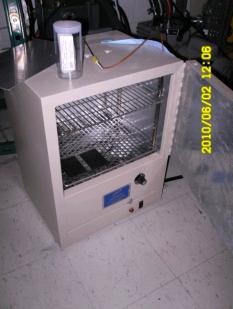
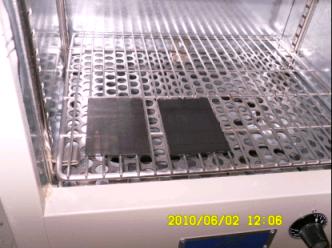
Prewarm the oven to 200 C. Check the temperature with a thermometer –there is a digital one in the Detector Lab that can be borrowed, ask John Yurkon. Place the slide on the grate, with the carbon foil facing up. The slide has a sticker on the other side. Allow the foil to bake for 30 minutes, or more.
Figure 1. Oven used in June 2010, belonging to Betty.
Figure 2. Close up of carbon foils on grate, foil side up.
When done, turn off the oven and open the door to allow the foils to cool. Slides will be hot! Do not move them until they have cooled. There may be some discoloration or textural changes after baking – this is normal.
II. Cutting
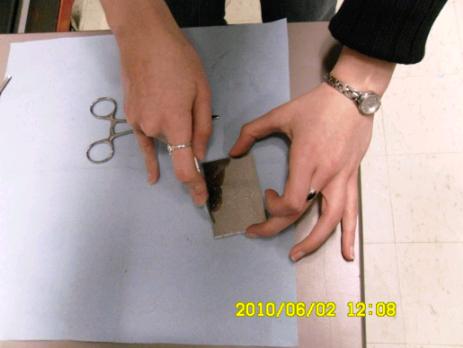
The edges of the carbon are the points most likely to crack, and harder to float. We need to prepare the edges with a scalpel, or other precise blade. Hold the plate firmly in one hand and run the blade along the long edges of slide, applying pressure to the side where the foil meets the slide to help separate them. You should see a slight bubbling effect along the scraped edges.
Where the foil will be held by the clamp, a small amount will have to be cut off. Using a straight edge, cover the area of the foil that has to be removed. Run the blade along the straight edge, applying pressure to break through the carbon foil cleanly to the glass slide. Trim off as narrow a strip as possible, leaving plenty of room to cover the oval aperture and enough room on one of the short sides to be held by the clamp.
Figure 3. Cut foil with scalpel.
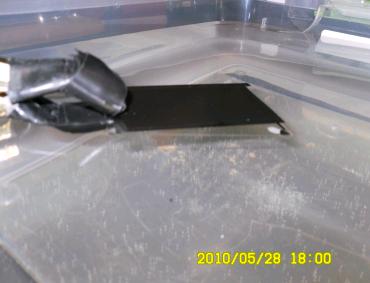
Figure 4. Carbon foil after cutting. Lines can be seen close to the edges of the foil. *Note: This is a photo of a foil in 2010. As of 2014, only one cut was made to the foil.
III. Setup for Floating
Before we can float the foil, we need to setup the following:
- MCP frame, with oval cut out of the mylar
- Lab jack
- Tub filled with deionized water (DI water; found in the Detector Lab), deep enough to submerge a vertical MCP frame, leaving about an inch of room from the top.
- Ringstand: See Figure 5. Attach a clamp that can hold the slide at a shallow angle (~20⁰) with clearance over the side of the tub. To get the angle, borrow adjustable angle clamps from John Yurkon. You can use a burette clamp wrapped in electrical tape or a three pronged clamp to hold the slide. Allow the clamp to hold the slide firmly and not damage it.
- Tweezers with a good grip. If possible, use the scissors-style tweezers with lock feature—but do not lock the tweezers! The impact of unlocking can break the carbon foil
- Box of Kimwipes or other gentle tissues for drying.
Figure 5. Ringstand with clamp held over the tub of DI water
Center the tub of DI water on the lab jack at lowest height. Secure the slide in the clamp without covering the cut line. Adjust the pitch of the slide so the leading edge is parallel to the surface of the water. Adjust the height so the slide is about an inch over the surface of the water, this should be enough room to make adjustments and not splash the carbon foil. Check that the clamp extends far enough over the edge of the tub that the foil can be fully lowered into the water.
Keep extra deionized water at hand to raise the water level if needed.
IV. Floating
Raise the lab jack slowly to bring the water level up to meet the bottom of the slide. When the two first meet, stop and proceed extremely slowly.
Figure 6. Raise the lab jack slowly. Our tub was too heavy and required two people for the initial lifting. To make this easier, adjust the jack to a height where it is easy to fit your hand in the space between the table and tub, before placing the tub on the jack. Adjust the ringstand set-up to match.
Adjust the jack so the water just barely spills over onto the slide. Allow the water to creep across the slide. Do not touch the jack before the water stops moving. If the water is not going across a small part of the slide, you may insert the tip of the tweezers gently into the water near (not touching) the area of issue to break water tension. You may need to raise the jack slightly to allow the water to get all the way across the edge of the slide. Floating this leading edge is the most critical step. Do not rush the process.
After the water has broken the front of the slide, slowly raise the jack. The front edge of the carbon will lift, check to see that it is floating on the surface before proceeding.
Continue to raise the lab jack slowly, allow the water to seep between the foil and the slide. Small wrinkles will appear as the water branches out. Try to avoid sudden starts or stops in movement of the jack, it may cause tearing of the foil. Watch the long edges of the carbon foil for tears as you progress up the slide. Continue to raise the lab jack until the carbon foil detaches from the slide. A successful float will look like Figure 6.
Troubleshooting:
- If there is not enough clearance for the arm of the clamp to clear, you will need to add more water to the tub. Use a washbottle to deposit the water slowly and steadily, in the opposite corner from your foil.
- You may need to push the ringstand backwards to help the foil detach. Do this very carefully.
Figure 7. The whole carbon foil is floating on the surface of the water, but has not yet detached from the top of the slide.
When the foil detaches from the slide, blow gently onto the surface of the water to push the carbon away from the slide. Do not blow directly onto the foil, it may break.
The slide is difficult to see in the water. When possible, move the clamp and empty slide to the side of the tub, or remove them. Be careful not to drop water onto or near the foil when removing the slide. Alternatively, gently release the slide from the clamp, and allow it to sink to the bottom of the tub. The clamp can then be moved out of the way.
V. Deposit onto Mylar Frame
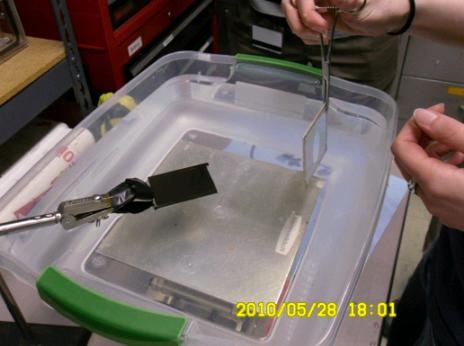
First practice moving the MCP frame in the water away from the carbon foil. Hold the frame by the corner with the tweezers, with the Aluminized side towards yourself, the side where the carbon will be deposited. Lift the frame straight up in the water, slowly—you should see a thin film of water across the oval aperture. This is good practice for lifiting the carbon foil. We want to balance the surface tension on the Carbon so it will not break. If the water breaks into beads, the pull is too slow.
Figure 8. Practice raising the frame in the water.
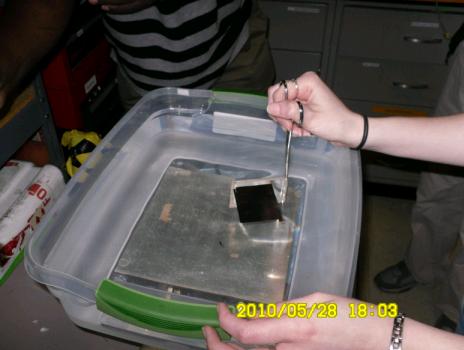
Figure 9. Approach the carbon foil with the frame fully submerged. Align the edge of the foil with the top of the frame.
When ready to lift the carbon, position the submerged frame underneath the carbon foil, so the short edge of the carbon foil lines up with the top edge of the frame. Raise the frame to just underneath the carbon. You want to catch the short edge of the carbon on the lip of the frame, this provides an anchor for the foil. The two edges should be parallel, and the carbon centered on the frame.
In an even motion, raise the frame and allow the carbon to drape over the aperture. Do not move the slide laterally, it will rip the carbon foil. Try not to make any sudden starts or stops in the raising motion. The carbon needs to cover the aperture entirely. If it does not, lower the foil back into water the same way (vertically, smoothly) and try again.
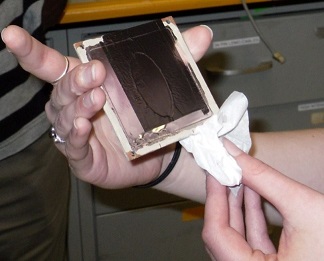
Carefully dry the edges of the frame by dabbing with a Kimwipe. Be sure to dry the edges where water catches. Do not apply pressure to the carbon foil or the mylar. Set inside a frame container upright, and allow to dry in air completely before using. Mark the frame with the carbon foil thickness when dry.
Figure 10. Completed frame. Dry edges with Kimwipe.

